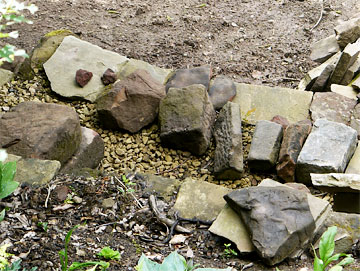
Building the Lowest Layer of a Dry Stone Wall
Alignment of the Wall
Before laying any additional stones, you should position the "A" frames at either end of the wall and secure them vertically. This can be done with guy ropes or old pieces of wood hammered into the ground and nailed to the frames.
Once the frames are in place you can use them in conjunction with a couple of lines to ensure the foundation layer of stones is reasonably straight. If there are any variations, now is the time to correct them since they are likely to be magnified as the wall is built.
Stretch lines between the frames on both sides a few inches above the base. The aim is to use these to ensure the next layer of stones is reasonably horizontal, so it is essential that the lines themselves are horizontal. The exact height of the lines above the base is not critical but should take account of the typical height of stones that you are using. This technique is the same as is used by a bricklayer but because the stones are variable in height, so the position of the line can only be set approximately.
Laying the First Course

The next course or layer of stones is the first that is visible above ground and the first layer of true stone walling, since the lower level is larger composed of small stones and pebbles.
Select stones of varying size. The flatter they are on the top and bottom faces the better since this will make for a more stable surface for subsequent layers. Having said that, the stones may vary in height since at higher levels stones will be selected to compensate for such variation.
View each stone as you place it and position the best looking face outward. If all faces are too rough for your liking, you may need to dress each stone with the hammer (or hammer and chisel).
When placing stones into the wall, try to avoid laying long pieces of stone along the length of the wall. This tends to weaken the finished structure, whereas when long pieces of stone are laid across the wall (as tie stones or bonding stones) they tend to bind the wall together and give it strength.
Ideally, each stone should slope slightly downward from the centre to the outsides of the wall so that water will tend to run off instead of flowing into the centre of the wall where it could freeze in cold weather and force stones out of position.
You also want each of the stones to be as stable as possible. To achieve this you should use smaller stones or pebbles between the large stones to prevent them from swivelling and, if necessary, to achieve the slight downward angle.
You also need to find stones that can be bedded in at both ends of the wall where they act as a barrier that retains the centre infill of the wall. In practice, when building a simple wall, the ends can be the most challenging features and need most care in selecting, dressing and positioning stones.
What you are doing with the first course of stones is to build two parallel walls with a space between them. You should fill the inner space with rubble, to help lock everything together. Once again, as with the foundation layer, the aim is to achieve a roughly level and horizontal surface along the length and width of the wall and keep both sides of the wall straight according to the lines that are stretched between the two "A" frames.
Read more about Dry Stone Walling |
Read about more Gardening Techniques |
