
Path Construction Methods
Design Considerations
If the path is to be suitable for purpose, it is wise to do a little planning before you start the hard work of construction.
Decide the width of the path, which will depend on its intended use but will rarely be less than two feet wide and may be three or four feet wide in a larger garden.
You need to allow for surplus rain water to drain away. If there is a natural slope to the ground this may be all that is required. If the land is more or less flat, however, it will be necessary to incorporate a slight gradient from one side of the path to the other, ensuring that as the water drains away it doesn't cause problems elsewhere in the garden.
This is particularly important if the path is being built up to a wall of a house. Identify the height of the damp-proof course in the house wall and then ensure the surface of the path is at least six inches lower.
A little bit of planning will help enormously when it comes to calculating the amount of materials you will need for the foundation and for the actual paved surface.
Read Also:
Foundation
Mark out the route of the path. It may be possible to do this with stakes and string if it is reasonably straight. However, if complex, it might be easier to use a spray paint can for the purpose. Special spray cans are available for this purpose that operate upside down in contrast to regular spray cans that need to be kept in an upright position.
When it comes to construction, the most vital feature is one that is never normally seen, namely the foundation. Obviously the strength of the foundation will vary according to the traffic for which the path is intended to be used. However, having made that basic statement, it is vital that the foundation is able to cope with the heaviest traffic that will ever use the path or drive regardless of how infrequent that might be.
If the foundation is inadequate then sooner or later, the surface of the path will become uneven and potentially very expensive to restore. Consequently the old adage applies that it is better and cheaper to do the job right first time rather than have to do it over again.
The depth of the foundation will depend on the traffic to be carried, the nature of the underlying ground and the paving material to be used for the surface of the path. A path intended for light traffic will only need a foundation layer around three inches thick. On the other hand a driveway or path intended to take the weight of the family car will require a foundation more like six inches thick.
Starting the Work
The first step is to dig out a trench that is deep enough to allow for the foundation and the paving materials.
You must then ensure the underlying soil is well compacted. For light traffic, it may be possible to achieve this by walking all over the area on your heels. However, for heavier traffic or for a larger surface area, mechanical means such as a heavy roller or vibrating compactor will do a better job in less time and with less effort.
The main component of the foundation is some form of rubble, broken bricks or crushed stone. The procedure is to add the larger pieces first and then fill in the gaps with smaller pieces. As with the underlying ground, it is essential that the hardcore is firmly compacted to minimise the possibility of it settling later.
If you are using concrete or similar material for the path, the hardcore foundation may be all you need. However, if you intend to use paving slabs, bricks, setts or similar, then you will need to add a layer of sand to produce a consistent flat surface. Once again it is important to firmly compact the sand on top of everything else.
Laying the path surface
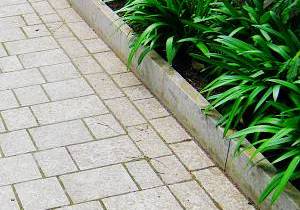
For any kind of path, you may decide that you want a curb along the edges. If you intend to use gravel, then a curb is virtually essential to keep the gravel in place – at least most of the gravel for most of the time since it is virtually impossible to prevent some stones being kicked into surrounding areas from time to time.
For an appreciation of the advantages and disadvantages of each type of path, see Types of Garden Paths.
For concrete you will need to construct wooden shuttering to hold the wet concrete in place. The top edge of the shuttering needs to be at the exact height of the finished path, including any gradient to allow rainwater to drain away.
For many materials, a curb is optional but in most cases it can be difficult to achieve a neat edge without a curb.
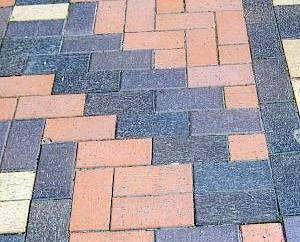
The final step is laying the surface. This task varies greatly from pouring in gravel or concrete to positioning stone slabs, bricks or setts. The most important consideration is to take as much care and time as is needed to achieve a consistent flat surface. It would be a shame to spoil all the good work involved with a solid foundation by small variations in the final surface resulting from a rushed job.